Introduction to Finish Trim: Enhancing Your Home’s Aesthetic
When it comes to refining the interior design of a home, the details often make all the difference. Finish trim, also known as moulding or millwork, is a crucial element that elevates both the visual appeal and perceived quality of any space. From crown moulding crowning your ceilings to baseboards that create a seamless transition between wall and floor, finish trim serves as the finishing touch that transforms functional elements into stylish accents. Whether you’re undertaking a new construction project, a renovation, or simply updating your interiors, understanding the nuances of finish trim enhances your ability to select, install, and finish these vital components with professional-level quality.
To truly appreciate the significance of finish trim, it’s helpful to explore the various types, materials, installation techniques, and finishing methods involved. This comprehensive guide aims to provide homeowners, builders, and DIY enthusiasts with expert insights and practical steps for achieving flawless, durable, and aesthetically pleasing finish trim results. As the foundation of refined interior detailing, finish trim not only complements your architectural style but also ensures long-lasting beauty and craftsmanship. For a seamless experience, consider partnering with professionals who understand the intricacies of trim installation—like Finish trim—to attain the highest standards of quality.
What is finish trim and why does it matter?
Finish trim encompasses the decorative mouldings and moldable components installed at critical transition points within interior spaces. Typically, finish trim includes baseboards, crown moulding, door casing, window trim, and chair rails—each serving both functional and aesthetic purposes. Functionally, trim covers gaps and imperfections between walls, ceilings, floors, and built-in features; aesthetically, it adds character, depth, and visual interest by framing architectural elements.
Why does finish trim matter? Because it directly influences the perceived quality and style coherence of a space. Well-crafted, precisely installed trim creates a polished, cohesive look that reflects careful design. Conversely, poorly executed trim may appear uneven, mismatched, or unfinished. Beyond aesthetics, finish trim also contributes to acoustics and insulation by sealing gaps and reducing drafts. Properly chosen and installed finish trim can significantly boost your property’s value, appeal, and comfort.
Common types of finish trim used in residential projects
Understanding the basic categories of finish trim is essential to selecting the right components for your project. Here are the most prominent types:
- Baseboards: Installed along the bottom of walls, baseboards cover the joint between wall and floor, smoothing the transition and protecting walls from kicks and scuffs. They vary from simple, flat profiles to elaborate, decorative designs.
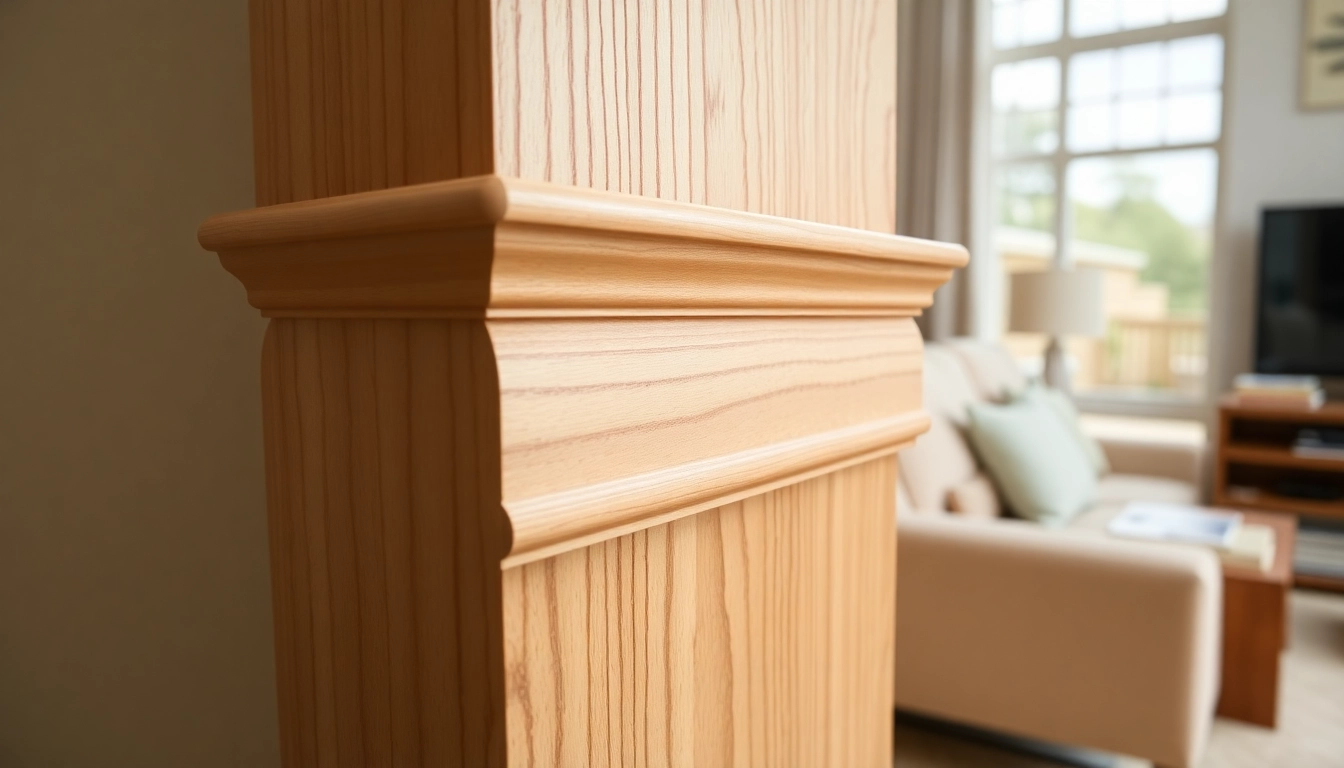
- Crown Moulding: Located at the junction between walls and ceilings, crown mouldings add elegance and architectural interest. They soften transitions and can range from modest to ornate styles.
- Door and Window Casing: Trim surrounds doors and windows, framing these openings while hiding gaps and structural imperfections. Casing styles can be simple or elaborate, depending on the desired aesthetic.
- Wainscoting and Chair Rails: These horizontal mouldings are used on walls for decorative or protective purposes, adding character and defining interior spaces effectively.
- Picture Rails and Architectural Mouldings: These elements serve decorative functions, often incorporating intricate profiles and detailing to enhance historic or modern interiors.
Each type of trim serves specific roles but collectively contributes to a unified interior design theme. Selecting appropriate styles and profiles requires understanding the architecture of your home and your personal style preferences.
Key benefits of properly installed finish trim
Investing in high-quality installation of finish trim offers numerous advantages:
- Enhances Visual Appeal: Well-fitted, smoothly finished trim lines create a cohesive and polished look, elevating the interior’s style.
- Highlights Architectural Details: Properly chosen and installed trim emphasizes design features, making spaces more dynamic and inviting.
- Increases Property Value: Quality craftsmanship and detailed finishes are attractive to prospective buyers and can boost appraisal values.
- Protects Walls and Floors: Trim acts as a barrier against impacts, scuffs, and wear-and-tear in high-traffic areas.
- Facilitates Easy Maintenance: Finishing with paint or stain helps clean and maintain trim, keeping it looking new over years.
Ultimately, mastery of installation techniques and finishing ensures your trim remains durable, visually appealing, and true to your design vision.
Selecting the Right Finish Trim Materials and Styles
Popular materials: wood, MDF, PVC, and their advantages
The foundation of any successful trim project starts with material selection. Each material offers unique benefits tailored to specific needs, budgets, and design preferences:
- Wood: Traditional and highly versatile, natural wood (oak, pine, poplar, cedar) provides authentic aesthetics and durability. It accepts paint, stain, or clear finishes well. However, it demands proper sealing and maintenance to prevent moisture damage.
- MDF (Medium Density Fiberboard): Cost-effective and dimensionally stable, MDF is great for painted finishes. It resists warping and is easier to cut and shape than solid wood, making it popular for intricate profiles.
- PVC (Polyvinyl Chloride): Ideal for areas with high humidity or water exposure, such as bathrooms, basements, and exteriors. PVC trim is lightweight, insect-resistant, and requires minimal maintenance, but it can be less refined in appearance.
- Composite materials: These combine wood fibers with resins and can offer the aesthetics of wood with superior moisture resistance.
Choosing trim styles to match your decor (crown, baseboard, casing)
Matching your trim style to your interior design theme is key to achieving harmony and enhancing aesthetic appeal:
- Traditional Styles: Features like ornate crown mouldings, wide baseboards, and detailed casings add historical charm and grandeur. Ideal for classical, Victorian, or Colonial interiors.
- Modern Minimalist: Clean lines, simple profiles, and subdued finishes suit contemporary spaces. Narrow baseboards and flat mouldings emphasize simplicity and openness.
- Rustic or Farmhouse: Reclaimed wood, distressed finishes, and straightforward profiles add warmth and character, fitting for country or farmhouse designs.
- Transitional: Balancing traditional with modern elements, transitional styles feature moderate profiles and neutral finishes suitable for versatile decor.
Matching trim profiles with architectural features
Aligning trim profiles with the architectural style of your home ensures cohesiveness. For instance:
- Mouldings in colonial or Victorian homes often feature intricate carvings and wide profiles.
- Modern interiors favor flat, simple profiles with little or no ornamentation.
- Historical restoration projects typically require period-appropriate profiles to preserve authenticity.
Consulting with design professionals or referencing architectural guides can assist in selecting the right profiles and ensuring seamless integration with your space’s overall style.
Preparation and Planning for a Professional Finish
Measuring and cutting techniques for precise fitting
Accurate measurements are fundamental to high-quality trim installation. Always measure twice, and use tools like a measuring tape, combination square, and chalk line for marking. When cutting, employ miter saws with fine teeth and set the angle precisely for corners and joints. For intricate cuts or odd angles, use hand saws or coping saws, and consider templates for consistency.
For optimal fitting, dry-fit trim pieces before attaching. This process helps identify necessary adjustments, ensuring seamless joints and minimizing gaps.
Tools and supplies every contractor needs
A professional finish trim project relies on the right arsenal of tools:
- High-quality miter, chop, and coping saws
- Power drills or nail guns (finish nails or brad nails)
- Measuring tape, square, and level
- Caulk guns and caulking
- Sanding blocks, hand sanders, or electric sanders
- Paintbrushes, rollers, or spray equipment for finishing
- Clamps, mallets, and putty knives
Best practices for surface prep and caulking
Preparation ensures that your trim looks pristine and adheres properly:
- Ensure walls are smooth, clean, and free of dust or grease.
- Fill holes or imperfections with wood filler or spackle, then sand smooth.
- Sand the edges of cut pieces for clean joints.
- Prime surfaces if necessary, especially for painted finishes.
- Use painter’s putty or wood filler to fill nail holes and gaps, then sand smooth.
- Apply painter’s tape around edges to achieve clean paint lines.
Step-by-Step Guide to Installing Finish Trim
Surface preparation and layout marking
Start with a comprehensive plan. Measure and mark reference points, ensuring consistent heights and alignment. Use a chalk line for straight lines along walls and ceilings, and double-check measurements. Establish corner points with mitered cuts to ensure seamless joints.
Attaching trim securely and accurately
Fasten trim using a nail gun or finish nails, spacing nails approximately 16 inches apart along studs or framing members. Position nails slightly below the surface, then countersink and fill with wood or latex filler. For high-visibility areas, consider using adhesive for added stability along with nails. During installation, verify the level and straightness frequently.
Finishing touches: sanding, filling gaps, and painting
After installation, sand all joints to smooth out transitions and remove any excess filler or rough edges. Fill nail holes with matching putty and sand once dry. Prime and paint or stain the trim as desired, applying multiple coats for durability. Use high-quality paints, such as latex with a semi-gloss or satin sheen, for easy cleaning and a refined appearance.
Tips for a Flawless Finish and Long-lasting Results
Choosing the right paint and sheen for trim
Selecting the appropriate paint and sheen dramatically impacts durability and visual quality. For interior finish trim, semi-gloss or satin sheens are popular because they reflect light slightly, enhancing detail while resisting moisture and cleaning easily. Use high-quality paints like Benjamin Moore Aura Interior Latex or equivalent for superior coverage and finish.
Techniques for smooth paint application and touch-ups
To achieve an impeccable finish, employ the following tips:
- Use high-quality brushes or rollers designed for smooth surfaces.
- Apply paint in thin, even coats, avoiding drips and runs.
- Dip brushes lightly and work along the grain for natural flow.
- Allow adequate drying time between coats.
- Use fine-grit sandpaper lightly between coats for an ultra-smooth surface.
- Finish with a light topcoat or touch-up to perfect imperfections.
How to troubleshoot and fix common installation issues
Even with meticulous preparation, issues can arise. Here’s how to address common problems:
- Fill with matching caulk or filler, then sand smooth before painting.
- Nail pops or squeaks: Re-nail, countersink, and fill holes.
- Cracks or splits in trim: Replace broken sections or reinforce with wood glue and clamps.
- Paint drips or uneven coverage: Lightly sand and recoat areas as needed.

